How to Build Your Own Beekeeping Equipment
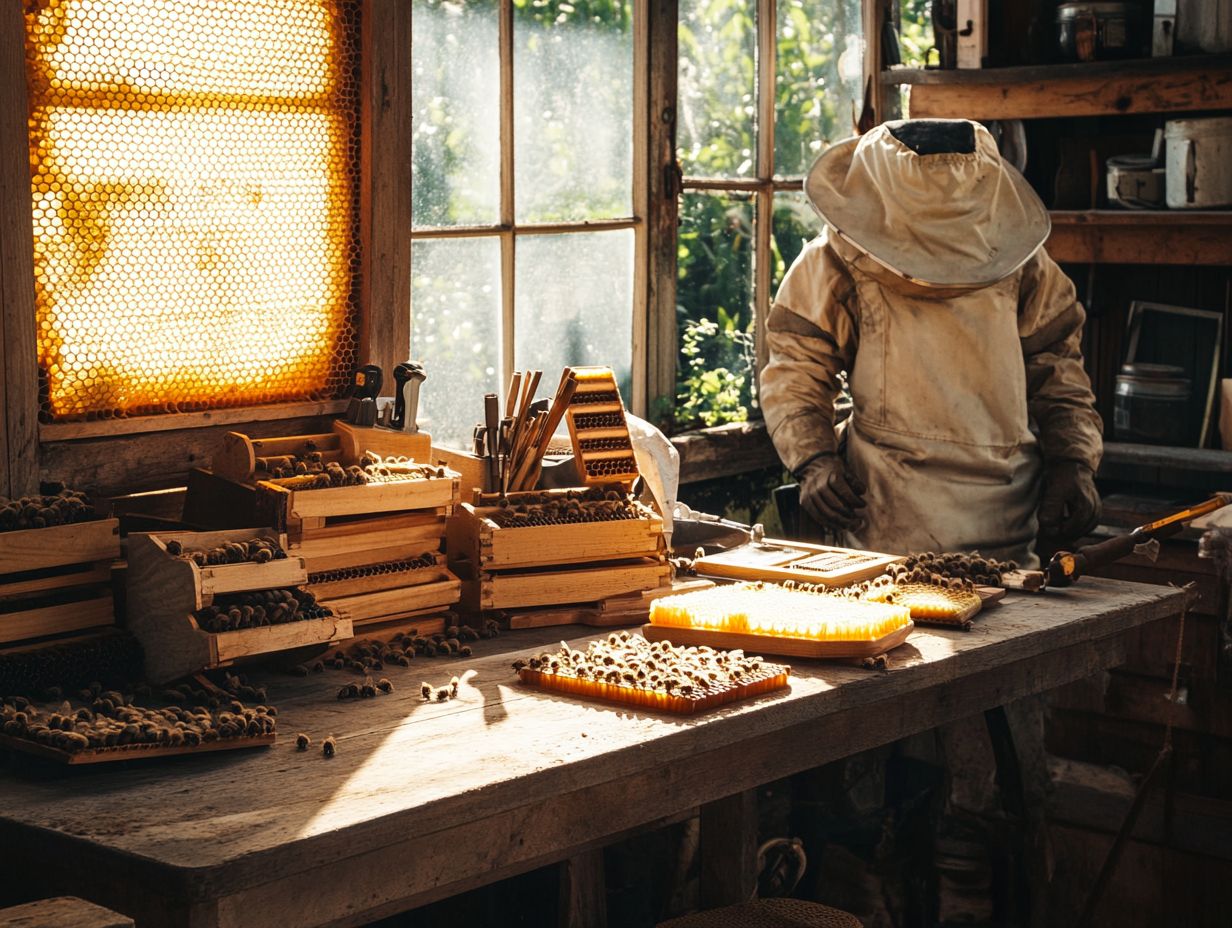
Dive into the rewarding adventure of DIY beekeeping! Building your own beekeeping equipment can be a truly fulfilling endeavor. Not only does it offer significant cost savings, but it also allows you to customize your gear and maintain greater quality control, especially with items like a smoker and jacket veil.
Whether you’re a seasoned apiarist or just starting your beekeeping journey, crafting your own hive boxes, frames, and essential tools lets you tailor your setup to meet your specific needs, including essential beekeeping tools like a bee brush.
This resource will guide you through the essential beekeeping equipment and materials required, offer a detailed step-by-step process for constructing your gear, and share valuable tips for maintaining it for years.
Contents
- Key Takeaways:
- Why You Should Build Your Own Beekeeping Gear!
- 3. Quality Control
- Essential Tools and Materials for Building Beekeeping Equipment
- Types of Beekeeping Equipment to Build
- Step-by-Step Guide to Building Beekeeping Equipment
- Tips for Maintaining and Repairing Beekeeping Equipment
- Frequently Asked Questions
- What materials do I need to build my own beekeeping equipment?
- Do I need prior woodworking experience to build beekeeping equipment?
- What are the benefits of building my own beekeeping equipment?
- Is there a specific type of wood that is best for building beekeeping equipment?
- Can I build my own beehive or do I need to purchase one?
- How long does it take to build your own beekeeping equipment?
Key Takeaways:
- Building your own beekeeping equipment can save money and provide satisfaction.
- Custom equipment meets the specific needs of your honey bee populations.
- You control the quality, ensuring durability and longevity.
Why You Should Build Your Own Beekeeping Gear!
Building your own beekeeping equipment can significantly elevate your beekeeping experience, particularly if you’re just starting and eager to connect more intimately with your hives. This hands-on approach not only deepens your understanding of bee management but also promotes sustainable practices that contribute to healthier hives.
With DIY equipment, you gain the power to create solutions tailored perfectly to your specific needs and preferences. Plus, you’ll become more familiar with essential aspects like how to use hive tools and the dimensions needed for frames. You can access resources like Betterbee and a wealth of insightful beekeeping literature to master the art of crafting effective tools.
1. Cost Savings
One of the most compelling reasons to build your own beekeeping equipment lies in the significant cost savings, especially when compared to purchasing pre-made kits.
Many aspiring beekeepers find the initial investment daunting, but embracing DIY solutions can ease that financial burden. For instance, constructing hive boxes typically costs only about $30 for materials, while a ready-made option might set you back $100 or more. Smokers, essential for managing your bees during inspections, can also be assembled with minimal tools. A DIY smoker would run you around $25, compared to a commercial version that hovers closer to $70.
These examples highlight how engaging in home construction projects deepens your connection to the craft and leads to substantial savings.
2. Customization
Customization is a significant advantage when you build your own beekeeping equipment, allowing you to tailor designs to your unique needs and preferences.
By adjusting frame dimensions and ensuring the right amount of bee space (the space between frames that allows bees to move freely), you can create an environment that fosters optimal hive health and productivity. When the internal structure of the hive aligns with the natural behaviors of the bees, it simplifies management and boosts honey production efficiency.
Your design choices can reflect local climatic conditions and the specific species of bees you’re nurturing, paving the way for successful outcomes. This level of customization gives you the power to innovate and adapt, resulting in hives that are functional and in harmony with the bees’ natural instincts.
Don’t miss out on the chance to save money and customize your beekeeping gear! Start building today and transform your beekeeping journey!
3. Quality Control
Quality control in beekeeping equipment is essential for ensuring the health and productivity of your honey bee populations.
Utilizing high-quality materials and dependable woodworking tools is crucial. It directly impacts the longevity and effectiveness of your hive equipment. When you invest in sturdy materials, you create environments that can endure various weather conditions, promoting the well-being of your colonies.
By using the right tools during production, you achieve the precision and consistency necessary to maintain the integrity of your hives.
Strict quality control boosts durability and promotes sustainable practices that prioritize both the health of your bees and the efficiency of your operations.
Essential Tools and Materials for Building Beekeeping Equipment
To successfully build your own beekeeping equipment, gather the right tools and materials. This includes woodworking tools like saws and drills, as well as specialized beekeeping tools such as hive tools, smokers, and gloves to keep you protected and working efficiently.
Materials like nails and screws, along with a bee brush for gentle hive management, are essential for crafting reliable and effective equipment. Understand your specific needs as a beekeeper—whether for hive inspections or honey production—to choose the most suitable tools and materials for your project.
1. Saw
A saw is a must-have for crafting your own beekeeping equipment. It gives you the power to make precise cuts in various materials.
The type of saw you choose can significantly influence the quality and accuracy of your projects. For example, a table saw creates straight cuts on larger pieces of lumber, making it ideal for constructing hive bodies and frames.
Conversely, hand saws excel at intricate work and are easier to maneuver in tight spaces. Selecting the right saw ensures that your frames and hive bodies are dimensionally accurate, enhancing the overall durability and functionality of your equipment—vital for maintaining the health and productivity of your bees.
2. Drill
A drill is crucial for creating holes and securing components of your beekeeping equipment.
The type of drill you choose can make all the difference. Cordless drills offer the freedom to work anywhere without being tethered to a power source, which is especially useful in field settings.
Hammer drills are ideal for tackling hardwoods, ensuring that frames fit together perfectly without compromising their strength. Using drill bits specifically designed for wood enhances your drilling experience, allowing for precise holes while minimizing the risk of splitting.
3. Hammer
Picking the perfect hammer can make all the difference in your construction journey! A hammer is crucial for driving nails into your beekeeping equipment and ensuring sturdy construction.
Each type of hammer serves a specific purpose. The claw hammer is perfect for both driving and removing nails from wooden frames, making it ideal for assembling hives. A sledgehammer is useful for working with heavier materials, like treated wood, or when aiming for a solid bond between joints.
A rubber mallet is also valuable for handling delicate components, allowing you to assemble frames without risking damage. Understanding these distinctions will boost your efficiency and extend the lifespan of your beekeeping projects.
4. Nails and Screws
Nails and screws are an important part of assembling beekeeping equipment. They provide the structural integrity necessary for each piece.
When selecting fasteners, consider various options. Galvanized screws resist rust and corrosion, making them ideal for outdoor use. Wood screws are designed to secure wooden components effectively, making them perfect for hive boxes. Nails offer a quick and efficient way to assemble frames and foundations.
Stainless steel fasteners ensure exceptional durability, especially in moisture-laden environments. Choosing the right nails and screws significantly enhances the longevity of your hives. This facilitates effective maintenance and fosters a healthier habitat for your bees.
5. Wood Glue
Wood glue is crucial for constructing beekeeping equipment. It provides extra bonding strength for joints and connections, essential for maintaining hive integrity.
There are various wood glue types, each tailored for specific applications. For example, PVA glue is popular for general woodworking projects due to its water resistance and strong bond—perfect for frames and supers. Polyurethane glue is known for its exceptional strength and gap-filling abilities, making it ideal for outdoor components facing moisture.
Using beekeeping gloves when handling adhesives is advisable to protect your hands. Epoxy is another strong adhesive that excels in high-stress joints, delivering unmatched durability.
Choosing the right adhesive boosts your hive equipment’s longevity and creates a safe and stable environment for your bees. Beginner beekeepers should consult beekeeping books for tips on proper material selection.
6. Measuring Tape
A measuring tape is an essential tool for crafting beekeeping equipment. It helps ensure that your frame dimensions are accurate, which can significantly impact your DIY equipment projects.
This reliable instrument is key to achieving the precise measurements necessary for successful woodworking. Accurate cuts and fittings are non-negotiable; even the tiniest miscalculation can lead to ill-fitting joints and structural weaknesses.
By using a measuring tape, whether you’re a hobbyist or a seasoned professional, you can ensure that every piece of wood aligns perfectly with the specified dimensions. This lays a solid foundation for your projects.
In beekeeping, where each component must work in harmony to protect your bees, the measuring tape is more than just a tool—it’s a cornerstone of quality craftsmanship.
7. Woodworking Clamps
Woodworking clamps are essential allies in assembling beekeeping equipment. They expertly hold pieces in place while glue dries or while securing joints.
These tools come in various shapes and sizes, each designed for specific tasks. For instance, bar clamps provide even pressure across large surfaces, making them perfect for assembling hive boxes and frames, including the popular Langstroth hive.
Spring clamps handle smaller components that require quick adjustments, while pipe clamps are flexible for larger projects.
By maintaining alignment and ensuring tight joints, these clamps significantly enhance the durability and overall quality of your equipment. This results in a more efficient and productive beekeeping experience.
Whether you’re constructing honey supers or building an entire apiary, choosing the right clamp can truly make all the difference, especially when using home insulation materials for added durability.
Types of Beekeeping Equipment to Build
Crafting your own beekeeping equipment is rewarding! Consider various types of gear you can create, each serving a unique purpose in managing your hives.
Key components include hive boxes, which provide a cozy home for your honey bee colonies. Frames help structure the space for those industrious bees to build their honeycomb.
Don’t overlook inner and outer covers, which shield the hive from weather. Bottom boards make inspections and maintenance easy!
1. Hive Boxes
Hive boxes are essential components of your beekeeping equipment. They serve as the primary living quarters for your honey bee colonies, particularly within the Langstroth system.
Typically made from wood or durable plastic, these boxes create a safe environment crucial for the health and productivity of your bees. They allow for better hive checks.
It’s important to know the different types of hive boxes available—Langstroth, top-bar, and Warré—each with unique features and benefits. For example, Langstroth boxes are celebrated for their ease of access and scalability.
You can customize these boxes with tools and accessories like entrance reducers and ventilation screens. This allows you to create a tailored experience that meets the specific needs of your bees and adapts to your local climate, which is especially important in sustainable beekeeping.
2. Frames
Frames are vital for your hive equipment. They provide the structure for bees to build their comb and store honey, making them key for honey production.
You’ll find various types of frames—standard deep, medium, and shallow—made from wood or plastic. Each type offers its own advantages based on your beekeeping techniques.
The size of these frames can greatly influence how bees interact within the hive. Larger frames provide more space for brood rearing and honey storage, while smaller frames might trigger swarming behavior, which is crucial for beginner beekeepers.
As a beekeeper, selecting the right frame size is a strategic choice that aligns with your specific goals and management style.
3. Inner and Outer Covers
Inner and outer covers are critical components of your hive equipment. They provide essential protection against environmental factors and pests.
The inner cover acts as a vital barrier, helping to regulate temperature by retaining warmth during colder months. It also ensures adequate ventilation to manage moisture, which is especially important during hive checks.
In contrast, the outer cover protects the hive from harsh weather, shielding it from rain and wind to keep the bees safe.
For construction, you might choose materials like plywood or metal for their durability. You can also integrate insulating materials such as foam to enhance your hive’s insulation efficiency, a practice encouraged by experts like Jim Tew and Jeff Ott.
Understanding how these components work together is key to keeping your bees healthy!
4. Bottom Boards
Bottom boards are an essential part of your hive equipment. They act as the sturdy foundation that supports the entire structure and are critical for stability during hive inspections.
These boards also help control pests, serving as a barrier against unwanted intruders. They aid in managing moisture levels, creating a healthy environment for your bees, particularly regarding home insulation practices.
By promoting proper air circulation and drainage, bottom boards help avert problems like mold growth and excessive humidity. This ensures that your hive remains a safe haven for colony growth and productivity—a goal shared by many sustainable beekeeping advocates.
5. Beekeeping Tools
Beekeeping tools are essential for managing your hive effectively. Key items like the smoker, hive tool, and bee brush should be at your disposal, especially when preparing for hive inspections.
Each of these tools plays a pivotal role in ensuring the safety of both you and the bees during maintenance routines. For example, the smoker soothes the bees, making them less likely to sting when you need to disturb the hive. The American Smoker is a popular choice among beekeepers.
While you could construct a simple smoker using a metal container and a bellows, it’s often more practical to purchase one from specialized beekeeping suppliers like Growing Planet Media for quality equipment.
The hive tool is your essential tool for opening hive boxes and cleaning propolis. It’s crucial for any hive inspection, ensuring you maintain a clean and functional environment.
Don’t overlook the bee brush, which allows you to gently collect bees without causing harm. It’s particularly handy when transferring frames or relocating colonies, making it a must-have for both novice beekeepers and seasoned pros.
Mastering these tools can elevate your beekeeping game! By understanding their functions and proper uses, you enhance your hive management skills and mitigate risks associated with handling these industrious insects.
Step-by-Step Guide to Building Beekeeping Equipment
Constructing your own beekeeping equipment might feel intimidating at first. However, with this step-by-step guide, you’ll find the process manageable and rewarding, especially when starting with simple DIY equipment.
Whether you’re a novice beekeeper or an experienced enthusiast, a structured approach will help you achieve outstanding results. Begin by gathering the necessary materials and tools, then select plans or design your own. Reference resources like Honey Bee Obscura for inspiration.
Accurate measurements and precise cuts are essential. Assembling the pieces correctly will ensure your equipment is sturdy and effective. Finally, remember to sand and finish your creations to enhance both their performance and longevity.
1. Gather Materials and Tools
The first step in your beekeeping adventure is to gather all the necessary materials and tools. This sets the stage for a seamless construction experience.
Create a well-organized workspace and choose high-quality wood like pine or cedar. This ensures durability and weather resistance for your hive boxes.
Essential tools for your toolkit include:
- A saw for precise cuts.
- A hammer for assembly.
- Nails designed for beekeeping, capable of withstanding the elements.
Don’t forget a level to keep everything aligned perfectly. Stability is crucial for maintaining a comfortable environment for your bees.
Collect non-toxic paint or a preservative to protect the wood while ensuring the safety of your pollinators. Having a drill on hand will make the assembly of frames and other components a breeze.
Get started creating your beekeeping equipment today—your bees will thank you!
2. Choose Plans or Design Your Own
Choosing the right plans or designing your own is essential for building your beekeeping equipment. This selection impacts the efficiency and productivity of your beekeeping endeavors.
Consider the specific types of beehives, frames, and tools that cater to your unique needs as a beekeeper. Personalizing your designs ensures they meet your requirements and align with your operational style.
Embracing modular designs can enhance your flexibility, making expansion or modification easy.
Make quality materials a top priority! Sustainable practices guarantee longevity and uphold environmental responsibility in your operations.
Tailoring your plans to account for local climate and bee species can further optimize the performance of your equipment, ensuring that your beekeeping journey is as fruitful as it is rewarding.
3. Measure and Cut Wood
Measuring accurately and cutting wood with precision are essential steps in your journey to building top-notch beekeeping equipment. Achieving the correct frame dimensions is crucial.
A minor deviation in measurements can lead to parts that don’t fit well, jeopardizing the integrity and effectiveness of your setup. To enhance your accuracy, use a reliable measuring tape and a square; these tools will help you obtain precise dimensions.
Mark with a sharp pencil and double-check your measurements before making cuts to elevate your results further.
By employing a miter saw or a table saw, properly adjusted for clean cuts, you can ensure that the wood pieces fit together seamlessly. Precision in this process forms the foundation for creating successful and durable beekeeping equipment.
4. Assemble Pieces
Assembling the pieces correctly is a critical step in ensuring the durability and functionality of your beekeeping equipment. When done right, this process boosts the performance of your gear and extends its lifespan, enabling you to maximize honey production.
To get started, gather your components—wooden hive boxes, frames, and supers—along with the necessary fasteners like nails and screws. Select the appropriate fastening methods; for instance, screws are often favored for their strength in holding heavier assemblies, while nails are ideal for lighter joints.
Don’t forget to pre-drill holes to prevent the wood from splitting, especially in softer materials. Mastering these techniques will significantly enhance the robustness of your beekeeping setup.
5. Sand and Finish
Sanding and finishing your beekeeping equipment are essential steps that elevate both the aesthetic and functional quality of your creations.
These processes do more than just create a smooth, splinter-free surface; they extend the wood’s lifespan, ensuring it can endure the challenges of outdoor use.
Proper sanding prepares the wood to embrace stains and sealants with greater effectiveness. Finishing options like natural oils, varnishes, or paints form a protective barrier against moisture and UV damage.
Selecting the right finish is crucial. It can dramatically enhance your equipment’s durability and look! For example, linseed oil penetrates deeply into the wood, enriching its durability, while marine varnish provides a resilient, glossy finish.
By choosing wisely, you can transform your equipment into something that is not just functional but also a stunning addition to your apiary.
6. Test and Make Adjustments
After assembling your beekeeping gear, test everything to ensure it works well. This helps catch any issues that could affect your bees.
Before introducing your colonies, inspect your tools—smokers, hive tools, and protective gear—for signs of wear or malfunction. Adjust the smoke intensity in the smoker; too weak, and it won’t calm the bees; too strong, and it will create unnecessary stress.
Proper testing and adjustments are crucial for beekeeping success. Even minor oversights can lead to stressful situations for both you and your bees. Take the time to get everything just right!
Tips for Maintaining and Repairing Beekeeping Equipment
Maintaining and repairing your beekeeping equipment is vital for the longevity and effectiveness of your tools. This ultimately benefits your honey bee colonies.
Regular inspections and cleanings can help prevent wear and tear. Timely repairs can sidestep more significant issues down the road.
By taking a proactive approach to maintenance, ensure that every piece of equipment—whether your hive boxes or essential tools like the smoker—remains functional and supports your beekeeping practices.
1. Regular Cleaning and Maintenance
Keep your tools in top shape with regular cleaning! This practice prevents the buildup of contaminants that could harm your honey bee colonies.
Establish a consistent cleaning schedule to prolong the life of your tools, such as hives, smokers, and honey extractors. This also fosters a healthy environment for your bees.
Techniques like thorough washing with warm, soapy water or using food-safe disinfectants effectively eliminate harmful residues. Understand the unique requirements of different materials—like wood versus plastic—to influence your cleaning process.
By prioritizing these practices, you can safeguard your colonies and keep them vigorous and productive, leading to a more successful honey harvest.
2. Repairing Damaged Equipment
Fixing damaged equipment promptly is essential to keeping your beekeeping tools effective and safe for your honey bee colonies.
Whether it’s a cracked hive tool or a rusty smoker, addressing these small issues before they escalate can save you time and money.
Common damage types include wear and tear on hive boxes, bent frames, or leaking feeders. For example, bent frames can be straightened with careful heat application, while rusty tools can often be restored by scrubbing and applying protective oil.
Leaks in feeders may only require replacement seals or new parts. By keeping a vigilant eye on these frequent wear points and taking action early, you can maintain optimal conditions for your bees.
3. Replacing Worn Out Equipment
Replacing worn-out equipment is crucial for successful beekeeping. Ensure your honey bee colonies are always well supported.
Identifying when your tools need a refresh helps maintain the health and productivity of your hive. Watch for signs like rust, cracks, or other wear that may indicate it’s time for an upgrade.
Observations such as decreased honey production or increased bee stress could signal underlying issues with your current gear. When it’s time for new tools, you have many options for sourcing replacements.
Local beekeeping supply stores offer expert advice along with a diverse range of products. Online retailers provide the convenience of shopping from home, often at competitive prices. Connecting with fellow beekeepers can also lead to purchasing used equipment in good condition—economical and sustainable!
Frequently Asked Questions
What materials do I need to build my own beekeeping equipment?
To build your own beekeeping equipment, you’ll need wood, nails, screws, a drill, hammer, saw, and protective gear.
Additional materials may vary based on the specific equipment you are making.
Do I need prior woodworking experience to build beekeeping equipment?
While some woodworking experience helps, it’s not a must.
You can easily find step-by-step instructions online or buy pre-cut kits designed for beginners.
What are the benefits of building my own beekeeping equipment?
Building your own equipment saves money and lets you customize it to fit your needs.
You’ll have exactly what you want for your beekeeping adventures!
Is there a specific type of wood that is best for building beekeeping equipment?
Use untreated wood that hasn’t been treated with chemicals, like pine, cedar, or cypress.
These woods resist decay and are perfect for outdoor use.
Can I build my own beehive or do I need to purchase one?
You can definitely build your own beehive using pre-cut kits or online tutorials.
If you’re new to beekeeping, it’s best to purchase a pre-made hive to ensure it’s built correctly.
How long does it take to build your own beekeeping equipment?
The time it takes varies based on what you’re building and your skill level.
Generally, it can take anywhere from a few hours to a full day to build a complete hive.

